
You Got an AIM Solo and a SmartyCam - Now What?
Congratulations, you've just purchased the most powerful entry level data combination ever! This combo has shaved a ton off of time of lap times since they have been released. Let's get everything hooked up and ready to hit the track.

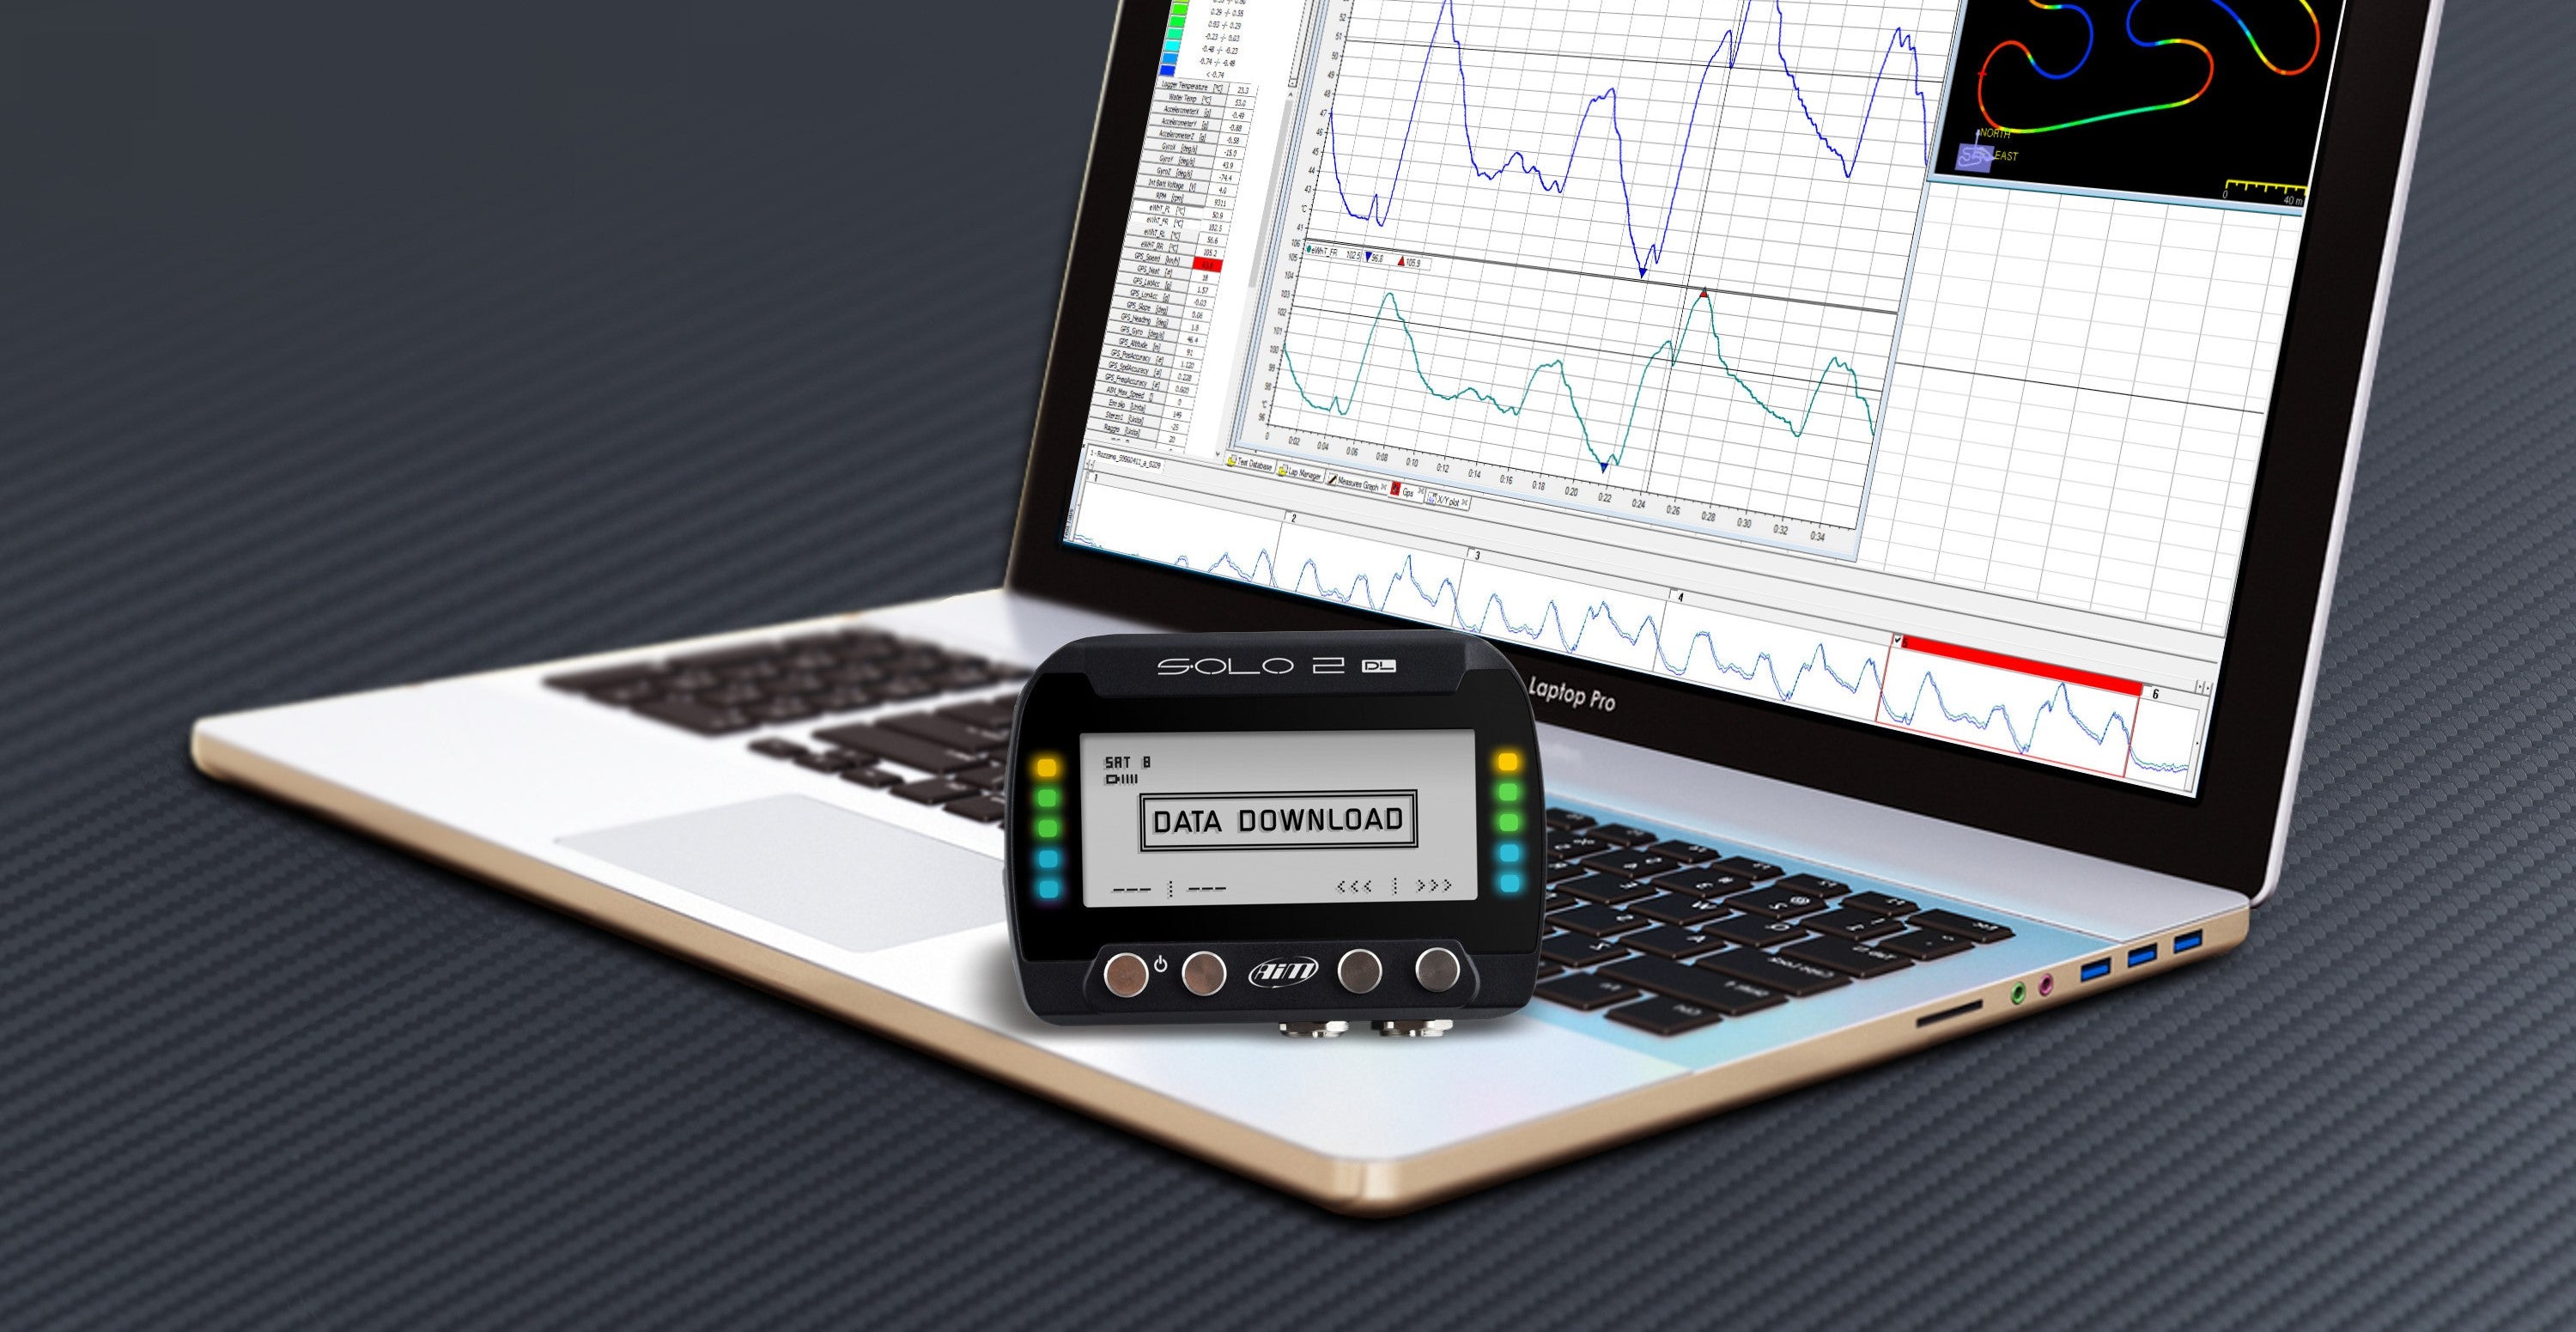
Configuring the Solo2 DL
Plug in your charger - even if you have a full battery, losing your work halfway through can be very frustrating.
Connecting the Solo2 DL to your computer will be done through a local Wi-Fi connection, this means that if you are using the internet in the background on Wi-Fi, you will get booted off by the Solo2 coming online.
To connect the Solo2, first open up Race Studio 3 on your computer and then power on the Solo2 by holding the power button. Once the device has powered up, you will need to click Devices on RS3. This is the far left icon on the top left menu. It looks like two arrows pointing in opposite directions. Once you have that tab open, you will need to click on the Wi-Fi logo in the top right corner of the screen. Here, you should find your Solo2 listed. Once you have selected that, the connection will initiate; this should only take a moment.

Once the connection has been made, it is an excellent first step to ensure that your firmware is up to date. The firmware tab is the far right tab. At the bottom of the list, you will see the current firmware that the device is running on. The unit that I am installing does need a firmware update, so let's talk about that now. Once you are on the firmware page, there will be a red NEW logo next to devices with updates. Select the firmware update for your device and click Download Updates at the top of the page. If you are using Wi-Fi for your internet connection, you will need to disconnect from the Solo2 and reconnect your Wi-Fi connection for this step. Once the files have successfully downloaded, the Solo2 will need to be reconnected. Navigate back to the firmware page and select the file that was just downloaded, then select Update Device at the top of the screen. This will prompt a pop-up window allowing you to choose the unit and execute the download. Once the firmware has been successfully downloaded, the Solo2 will restart.
If you want more detailed instructions on how to update the firmware on your AiM device check out the link below to our blog post all about it.
Update Your AiM Firmware - Don't Get Left Behind
Now, you can start configuring your device to suit your needs. You will need to navigate to the configuration page; this is the tab with two small gears at the top left of your screen. Once you are there, you can create a new configuration by clicking the small gear next to manual configuration. You will be prompted to name your configuration. Once you have named the configuration, click Receive in the page menu. Select the device that you want to configure and open up the new file.

Channels -
If you are using the RPM unit, you will need to start at the Channels page. You will need to set up your RPM so that the unit can properly interpret the data coming from the vehicle. Double-click RPM and that will open the RPM settings. From here, you can adjust the sampling frequency, max RPM, and RPM Factor. The RPM factory is something that may have to play around with, but a good rule of thumb is to select a value that equals half of your engine's total cylinders; for this example, I will be selecting /2 since I am installing it on a 4-cylinder engine. Another value that you may want to adjust is the speed output, by default, it is set to km/h, so if you are in the US, this is where you can set the speed to mph. Double-click GPS Speed, navigate to the “Unit of Measure,” and make your selection.

ECU Stream -
If you are using a CAN or OBD-II unit. This is where you can select your ECU so that the Solo2 can adequately read the data stream from your ECU. Follow the drop-down and select the proper protocol for your vehicle. If you need help deciding which protocol to use, check the link below. Please note that the protocol called for might not be your vehicle, but your vehicle will share similar ECU attributes to correctly translate the data stream
https://www.aim-sportline.com/download/doc/eng/SintesiECU-OBDII_eng_118.pdf

CAN Expansions -
This is where you can configure any add-ons, such as the LCU-One Wideband. I will cover more detailed set-up with extra sensors in a later article. For now we are just going to keep it simple.

Math Channels -
Here, you get to put on your nerd hat if you want; for simple setup all I add is Calculated Gear. This is your Solo2 using your speed and RPM to hypothesize which gear your car is in. Double click Calculated Gear and follow the prompts if you would like to incorporate your transmission gear into your data stream of video overlays. I will say that I found this to be less than perfect so I will be experimenting with this feature more in the future.

Parameters -
You can configure when your Solo2 will activate the download here, I find that the default settings work really well for most users. So feel free to pass this by for the time being. But if you would like to dial in when the recording starts feel, free to play the values in the section.

LED-Bars -
Here, you can decide if you would like the LED bars to represent either predictive lap times or shift lights. Personally, I find the predictive lap lights super distracting and have always opted for using these as shift lights, but play around and see what you like the most. If you are going to use these as shift lights this is where you can dial in when each light will activate. I personally like to set the green lights very low at the bottom of my power band, that way if I am driving and all the lights are out, I know that I am messing up and just cruising in too low of a gear. From there I set red as may max rpm, 7200 for this instance. Then from there, I count down by 500 rpm intervals and fill in the rest. But get wild there are lots of colors to choose from, do what suits you and will make the most sense while you are driving. There is a cool feature called “Activate Simulation” that will give you an idea of what the lights will look like, make sure to play around with this.


Display -
It's time to customize what you will be seeing while on track, this is going to be up to you. I like to have RPM, MPH, Lap Count, and Best Lap but it’s your time to shine, look through the options and make it just what you want. To adjust this first click on the display item that you would like to change and then double-click the section at the bottom left in the section with all of the Channel Groups.

SmartyCam Stream -
Here is where you decide what data is going to be output to the SmartyCam, so think about what you would like on your overlay for your videos and select the channels that you want. Simple as that.

CAN Output -
This is another advanced option that we will cover in a later, more advanced article; we are going to keep with the keep it simple theory still here.
Finishing up -
You are done, now you need to Transmit it to your Solo2 DL, click the Transmit button and it will push the data to the Solo2. Once this is successfully completed, you will get a confirmation message. At this point you are ready to go hit the track!
SmartyCam Sport 3 Configuration -
Plug in your charger - even if you have a full battery losing your work halfway through can be very frustrating. *Important note* The battery in the SmartyCam3 is tiny and will only support the camera running on its own for a few minutes. They are supposed to last about 20 minutes without any recording, so just be aware there isn’t anything wrong with it; they just have minimal battery capacity. They are designed to be used in conjunction with a device that can also share power or with an auxiliary power harness and GPS.
Connecting the SmartyCam Sport 3 is done via SD Card. The first step for this is to install the SD Card into your new camera and power it up. This will format the SD Card with the files needed in RS3. Once you have done that you can power off the camera by holding the power button for 5 seconds and insert the SD Card into your computer. Once that is done, open RS3.
The SD Card should appear in the Connected Devices column almost instantly. You will want to ensure that the latest firmware is downloaded on the camera as well, once you see your device go to the firmware updates page. If there is an update available you will see a red NEW logo next to the device. If you need to update the firmware download the firmware for your device. Once the download has been successfully completed you will need to update the SD Card. Select the SD Card for your device and click Update Device at the top of the screen. Once the download has been successfully loaded on the SD Card you will need to remove the SD Card and insert it back into the camera. Now, power the camera up and open up the menu, this is down with the button marked with a triangle. From there select Update and then select Firmware. Now you will select the firmware that you just downloaded and run the process. “Wait…” will display on the camera screen for a moment while the process initiates followed by a sliding scale signaling that the firmware is downloading. This may take a couple of minutes to finish. If everything goes correctly you will be greeted with a “SUCCESS!” message and the camera system will reboot. Power the camera off by holding the power button for 5 seconds.
If you want more detailed instructions on how to update the firmware on your AiM device check out the link below to our blog post all about it.
Update Your AiM Firmware - Don't Get Left Behind
Now that the camera is updated we can get to configuring what you would like to see on our video.
Creating New Configuration Files -

Open RS3 again; you won’t be selecting the SD Card this time, instead, you will be creating a new configuration file. Navigate to the Configuration page, this is marked by two small gears in the top left menu. Once you are there, you will need to create a new configuration file. Click the black gear next to Manual Configuration and select the device. Next you will name the configuration as well as create any notes that you might want. From here you can design what your videos will look like.
CAN Protocol -
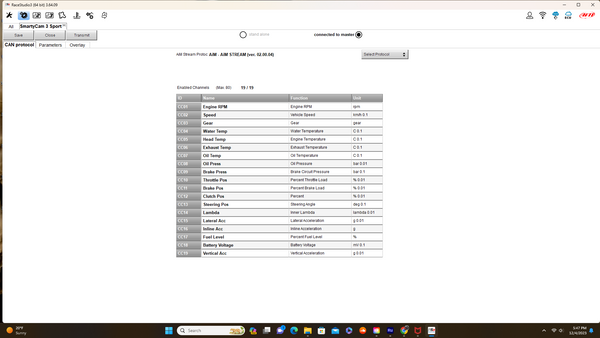 Here you can select toggle the items that you would like transmitted from the Solo2 to the camera as well as adjust the parameters of each. Simply double-click any item that you would like to adjust. This is also where you can adjust the units of measurement for each.
One of the best features in the SmartyCam is the ability to create and adjust an incredible amount of overlay data. This is all done by a simple drag and drop procedure. Take a look at all of the options in the left tab selection to the right of the screen; you can select various different tach/ speedo graphics, date/time, track maps, timing options, and even import your personal logos for adding that personal touch to your videos. Remember that this is what your final video will look like, so take some time to think about what you are okay with covering. But don't worry you can change this up at anytime.
Finishing up -
You are there; at this point you should be ready to transmit all of the data to your SmartyCam. Select Transmit at the top of the screen and reinstall the SD card into your camera. Power up the camera and open the menu, select the update page and then select configuration, this will transmit the data from the RS3 configuration file that you created on to the camera. Once this has completed, the camera is ready to record! So go out and do something film worthy!
